Wait, doesn’t Paid Memberships Pro do this?
Our plugin allows the member account to be created in one step as part of checkout. But, returning members need to be able to easily access your login and password reset pages.
PMPro does not alter the main WordPress login functionality, so users will see the same WordPress-themed “Log In” page that you are probably familiar with. Use our recommendation below to add frontend login.
Note: Some themes include pages for a front-end log in experience. If this is the case, we recommend keeping that experience in place as it may be more trouble to unravel and put another method in place.
Theme My Login by Jeff Farthing creates a themed (frontend) login, password recovery, and user profile section. In addition, we recommend the plugin for login redirection settings and blocked “admin” access.
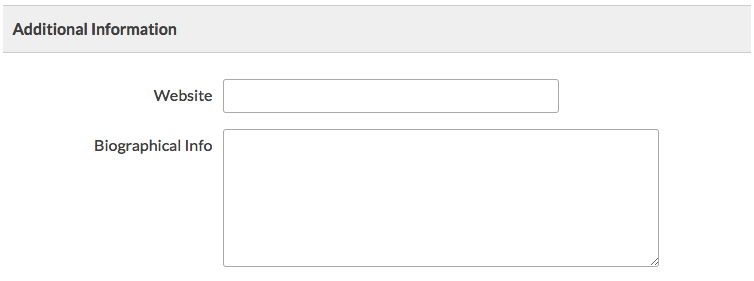
![Your Login Page with the default WordPress appearance.]()
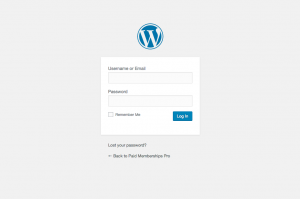
![Your Login Page with Theme My Login and the Memberlite Theme]()
Download Theme My Login via the WordPress.org Plugin Repository
…or search for “Theme My Login” from the Plugins > Add New page in the WordPress admin.
Configuring Theme My Login
When you activate TML, the plugin will generate five pages: Login, Log Out, Lost Password, Reset Password, and Register. All of these pages except the “Register” page will be used in your membership site (we redirect all User Registration to the Membership Levels page for level selection and, hopefully, membership checkout).
There are no additional steps required at this point to make TML functional. You can certainly edit the generated pages to add additional styles, widgets, wording, etc. Just be sure you do not remove the [theme-my-login] shortcode from the page content.
Where to add your “Log In” links
Today’s web user has certain expectations about your site’s “Log In” links. Here are some best practices to consider:
- The link is expected to be placed in the upper right corner of the page.
- Consider placing a “Sign Up” (Join or Register) link in this same space as well.
- The link should be present across all pages on your site.
- Swap to a “Log Out” link once the member has logged in.
- The “Log Out” link is often accompanied by a reminder of the logged in member’s display name that links to their membership account details or profile.
- If your site is responsive, make sure that your “Log In” links are present in the smaller device views, either at the very top of the screen or in your mobile/responsive menu.
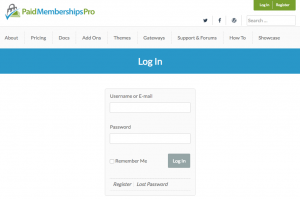
![pmpro_mobile-menu-widget-tml]() Memberlite does all of the above by default, excluding the “Mobile” view of your log in link. If you’re running Memberlite, I recommend using the TML plugin and adding the “Theme My Login” widget to the “Mobile Menu” widget area. The screenshot to the right shows how I have it configured for the Paid Memberships Pro website.
Memberlite does all of the above by default, excluding the “Mobile” view of your log in link. If you’re running Memberlite, I recommend using the TML plugin and adding the “Theme My Login” widget to the “Mobile Menu” widget area. The screenshot to the right shows how I have it configured for the Paid Memberships Pro website.
If your theme does not have a widget, menu area, or hook in place to add a log in feature in the upper right, open a topic on our members forum and we will help you find the best way to add this to your site.
We also include a “Log In” link in the default message that a visitor sees when trying to access members only content. Confirm that you have not removed this link by visiting the Memberships > Advanced Settings page in the WordPress admin.
Styling the Log In Page
TML is very lightly styled – the shortcode output on your generated Login and Password Reset pages will inherit your theme styling.
If you’re running Memberlite , here’s a little code to enhance the appearance of your Login/Lost Password/Reset Password pages. Set the “Page Template” to “Full Width” and replace the page content with the following:
[row]
	[col medium="4" medium_offset="4"]
		<div class="pmpro_message pmpro_default">[theme-my-login]</div>
	[/col]
[/row] |
I also checked the boxes to “Hide Page Title” and “Hide Breadcrumbs” in the Memberlite Settings box, then set the “Banner Description” to the following:
<h1 class="text-center">Log In</h1> |
The Conditional “Log In” link
After activating TML, navigate to the Appearance > Menus area of your admin. Under the “Pages” section in the left column, you’ll see pages titled “Log In” and “Log Out”. Add these two pages to your menu. TML has background logic in place to only show the appropriate menu link based on the user.
Take this one step further and use the Nav Menus Add On for Paid Memberships Pro. This will allow you to use the same theme location to show a different menu of links based on the visitor/user/member status. We use TML in combination with the Nav Menus Add On on this site to link to our member support forums for PMPro Core or PMPro Plus members using the “Member Menu” theme location of Memberlite.
Do More with Theme My Login
Theme My Login also has advanced logic for blocking the WordPress backend by “role”, as well as redirection on login based on “role”. You can read more about all the features of TML on their WordPress.org plugin repository listing.
If you’re looking to redirect members on login based on membership level, see this blog post on membership level redirection.


 As part of our ongoing